Posts

Showing posts from July, 2020

Restoring My Gut Health: Why Raw Milk

Image
Usually, when someone has gut health issues, the first thing doctors tell them to do is cut out dairy and gluten.  Typically, that's wise advise, but I have found restoration with raw milk. Raw milk is milk that is fresh from the cow and doesn't go through any treatments (except perhaps filtering).  It is the milk that calves get, not the milk sitting on grocery store shelves.  Therefore, it is chock full of the all the vitamins, minerals, digestive enzymes, etc that nourish the body.  It is, by nature, a healing elixir. It is also a liquid, which is easier to digest than solid foods in a troubled digestive system.  Of course, this only works if your body handles dairy well, even when the guts are off.  Thankfully, mine does.  It acts like a newborn receiving mother's milk. Where I live, it isn't too expensive and fairly easily accessible from a state-certified raw milk farm.  It's also just easy.  Reducing stress is very important i...

A Second Series: Restoring My Gut Health

Image
Since my kitchen redo is on hold until the yard sale is over, I decided to start a second series. I was doing pretty well over the winter, but once the Covid lockdown hit, the combination of stress and lack of access to foods started making me invisibly ill.  Over time, my symptoms started: Increased Food Intolerances Constipation Bloating and Gas Fatigue and Brain Fog Lower Tolerance to Stimuli Those were ignorable, but then other things started happening: Itchy Flakey, Painful Scalp with Build-Up Increased Acne The Won't Heal, Won't Respond to Treatment, and it Painful Wounds Slower to Heal and More Likely to get Infected Red Nose But Sallow Cheeks Those are obvious signs of gut disorder and lower immune system.  Soon enough, even healthy foods were churning my stomach after I ate.  I would start having these large, painful, (embarrassingly loud) burps and my family would say to me, "Mom!  What did you eat?!"  At first it w...

Slow Going on the Redecorating

Last week was busy and hectic with a few unexpected hiccups. This week is proving the same. Plus, it is hot and humid, and my kitchen bears the brunt of it. We're preparing for a big family yard sale this weekend, so most of my attention is on that.  The kitchen will have to wait, but I will try to accomplish a couple of little things.  Perhaps shore up the table so it'll support the hutch top better.  Also, I can apply the painter's tape around the room to prepare for priming and painting.  If it get very frustrated with the slowness of the project, I have a teenage son who is always looking to earn some extra money.  He's pretty good at painting, too.

That Pesky Junk Drawer

Image
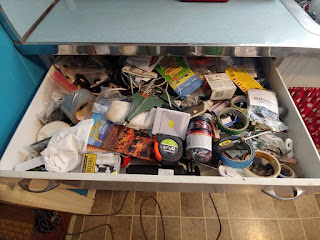
In a small kitchen, precious real estate shouldn't be taken up by items that better belong in a garage or workshop.  We had one of those junk drawers.  The kind where anything and everything gets thrown in there just to get out of the way.  Instead, I moved an old, clunky dresser to my basement to use as the ultimate junk drawer.  4 drawers worth!!  Now, I have a space for vacuum attachments, extra cords and power strips, paint supplies, and the junk drawer. Some would wonder why I don't just eliminate the junk drawer completely.  I don't because we actually do use and reuse items.  It is a revolving junk drawer and not a static one, therefore it is useful. As for my new and improved kitchen drawer, you might look at it and just say, "well, now it is a cute and organized junk drawer of a different sort!"  Indeed, I suppose it is.  But, it better organizes and eliminates several other drawers used in various furnishings and accessor...

Cottage Goal

I'm going to be honest in this post, and it isn't going to be pretty. My house stresses me out and exhausts me.  I feel like I can't catch a deep, refreshing breath in my own home. It's strange, because I do love it here, but it is also agonizing to live here at times.  It takes me forever to wake up.  I feel tired, sore, anxious.  I constantly wonder what is wrong with my health, but the strange thing is, when I leave my house I feel better. My goal is to be able to breathe in my own home.  I'm not sure how to do that, but I feel that decluttering, organizing, minimizing, cleaning, and freshening the place up with small renovations might help me find the answer and be able to sit in my own home, take a deep breath, and feel at peace.

Step 6: The Hutch Project

Image
This monstrosity was only $10.  After days and days of searching for hutch tops, I settled on this one.  It is the size I wanted, and the price was right.  I am pleased to discover most of it is solid oak.  Unfortunately, the parts that aren't are damaged, but it is still sturdy and usable. I am removing the chunky decorative piece at the top, and just leaving the top scalloped edge.  There's already only one ugly drawer pull, so that'll come off and be replaced with something prettier.  The whole unit will be sanded, primed, and painted.  

The Door

Image
When my time is limited, I find short, little projects I can do to pretty up my kitchen.  The door is a steel door that needed a good cleaning.  Plus the window trim needed to be painted.  I believe this is still just the primer base from when the previous owners installed the door. I had exterior white paint still on hand from this spring's projects, so a bit of that and a good scrubbing on the door, and it is so much better.  It really is amazing how little things like this make such a big difference.

Painted Metal Cabinets

Image
I was happy with how the first cabinet turned out that I had to move on to the second one.  You can see the stark contrast, and just how discolored the poor metal cabinet looks! I followed the same method, and am very pleased with how it turned out.  If you nose up to it you can see where spray paint dripped or spattered a little.  I'm no professional, but it really is hardly noticeable, especially from the floor. I love how they look all crisp and clean, especially against the freshly painted ceiling!

Plans for the Dark Corner

Image
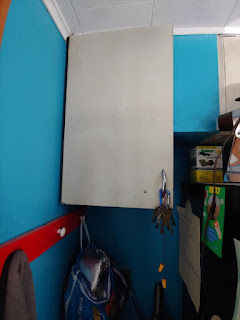
 Before After My galley kitchen has an inset where the refrigerator goes.  That dark corner has become a sort of closet catch-all over the years.  I decided to clean it up and move the microwave and cabinet in there to make room for chairs at a kitchen table.  However, I also decided that I don't like the microwave and cabinet there, and that the space would be better utilized as a sort of broom closet as it always has been, but perhaps improved.  For now, I'll keep the microwave and cabinet in there until the rest of the kitchen furniture and storage gets sorted.  It's at least cleaner and tidier for the time being.

Weekend Projects Completed

Image
My old electric apartment-sized range had scorch marks and yellowing on the sides.  Even though it is mostly tucked between the counters, just that bit sticking out is an eyesore and adds to an overall appearance of dinginess and dirtiness to the whole kitchen.  I purchased some high heat spray paint meant for heating units and grills.  All it took was one coat to clean up the range. Next project was to find a new home for my vacuum cleaners.  For now, I moved them onto the basement landing, but have since decided that the space next to the fridge will become a broom closet of sorts, if I can manage it looking tidy.  For now, though, I am sick of seeing vacuums in the kitchen and I wanted the space for a chair for the kitchen table.  (Sneak peek at the new kitchen table!)

Reflections on Cottage Renovations

Nothing says cottage more hand-me-downs and homemade. Cottages, by necessity, are small, simple structures meant as a cozy and inexpensive living space for the working class or vacationing middle class.  Historically, they were furnished with second hand pieces and maintained with DIY projects.  I'm keeping this in mind as I redo my kitchen, firstly, out of true cottage necessity, and secondly, as a sort of fun treasure hunt. I spent my budget last week on paint and a table.  (I'll show the table in a future post.)  Now, I have to wait to obtain the next round of income to utilize. As I look for furnishings, I've scoured my own possessions first.  Then, I looked locally.  I've found pieces that I'd have to travel for, but decided against spending the gas money and time to do so.  If I can't get it on the cheap locally, I'll just have to do without for the time being.  Any furnishings I get must be under $100.  Preferably under $50. So...

Weekend Projects

Image
  I don't have a broom closet right now.  It used to be in the closet in the 3 seasons porch, but the 3 seasons porch was redone into a bedroom for our daughter and the closet is hers, now.  So, my vacuum cleaners have resided in my kitchen since. I'm sick of the clutter, though.  I need to create a space for them elsewhere. The second project is getting some high-heat paint and cleaning and repainting my range.  Some day, ho pefully soon, we'll be switching to an LP range, but that doesn't mean I have to put up with an ugly electric range in the meantime.  I can clean it up.  Those little things do add up to making a space feel and look better.

Step 5: Experimenting with painting the cabinets

Image
My cabinets are original 1950 metal cabinets.  Painting them well is not easy.  I cannot afford to have them properly done, so I either have to leave them marred and scarred or find an adequate way to paint them.  I've been to estate sales where the original metal cabinets were painted and they were horrible!  Another big risk is that while the paint job might look good at first, the paint easily scratches off. A little online research, and I decided to try this method: 1.  Remove hardware and rough up the surface of the cabinet with steel wool. 2.  Thoroughly clean and dry the cabinet. 3.  Spray a layer of metal primer and let dry. 4.  Spray paint the desired color evenly and let dry for 12-24 hours. 5.  Spray paint a second layer and let dry for 12-24 hours. 6.  Spray a layer of clear coat and let dry for 12-24 hours. 7. Replace hardware. It's going to take a very long time to do all my cabinets this way, if it works....

Step 4: Choosing Colors

Image
Benjamin Moore (not sponsored or affiliated) has a line of historical paint colors from authentic 18th and 19th century paints.  Even though my cottage is 1950, I thought this would be an easy start for choosing paints for my kitchen.  Historical colors are classic, more natural looking, and definitely go with the cottage flow. Here in the picture, you can see my 1950 boomerang countertops with the paint chips I selected.  Since I am currently stuck with the countertops, I wanted my scheme to coordinate without being loud, like my kitchen is now.  You see the blue boomerangs?  That's the color of my walls right now.  Bright, loud, kitschy, mid-century fun.  But, I am ready for a lighter, cleaner, more classic, cottage color palate. My dining room and living room are a sunny cream color.  They are actually two different paints, but I was able to color match them almost seamlessly because they discontinued the dining room cream, then the living r...

Step 3: Paint the Ceiling

Image
The poor kitchen ceiling!  We had an infestation of flies one year.  Everyone was affected!  It was big news in the neighborhood as we lamented the buzzing and those red speckles they leave behind.  My poor ceiling is no exception.  Plus, we had a roof leak, so there's those stains, and some show-off put boot prints on my ceiling. Then, there was the exploding bottle of wine.... Needless to say, my ceiling needed to be painted!  If I had the budget, I'd pull down the old ceiling, put in something new, and put in two lights instead of the one lone fixture in the middle.  Instead, I simply painted the ceiling I have, cleaned the light fixture, and made sure I had a bright enough bulb in it.  If I have any wiggle room in the budget, I might update the fixture, but really, it's just a basic white kitchen fixture that goes with any style. Although, a low-profile fan light would be nice.  The ceiling is fairly low in my kitchen, though....

Step 2: Declutter

Image
Small, baby steps will be the modus operandi for this project.  My budget is small.  Thus far, I have spent $5 on quality magic erasers for cleaning. As you can see from my previous post, I've worked on decluttering, and, as I stated in the previous post, it still looks cluttered.  So, I'll say that I am still in Step 2.  Continued plans for Step 2 is to take down the kitschy décor, like the cheeky sign, the words over the sink, and a few other things on my walls.  I'll leave the polka dot curtains up because no one wants to see where I keep my trash, compost bucket, and recycling.  I haven't decided on a fabric, yet. That huge bag by the door is a 50 lb bag of flour!  I simply don't have a space for it, so there it sits.  I may have to divide it up into smaller bags so they'll at least fit in a cabinet. Step 3:  Paint the ceiling, clean the light fixture.

Cottage Kitchen Make-Over Step 1

Image
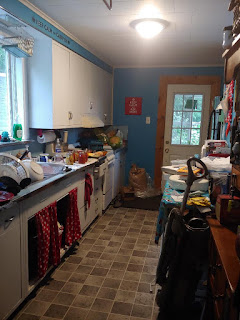
Now, keep in mind that this isn't going to be a Pinterest/Instagram-worthy display or renovation.  I would LOVE to be all financed and sponsored to turn my humble cottage kitchen into a showpiece, but that's not where I am.  This is AUTHENTIC cottagecore, after all.  That means I really do live in a country cottage, living a humble, rural lifestyle.  This is more about function than aesthetic. A little backstory: In my kitchen, the cabinets, countertops, and backsplash are original 1950.  The countertops are a blue boomerang atomic pattern with stainless steel trim.  Very mid-century.  Between having to work with that, and my love for the mid-century era, I decided to turn my kitchen into a kitschy 50's, cherry-patriotic-themed vibe.  The blue of the walls matches the darker blue boomerangs on my counters.  The aesthetic has been fun and cute, complete with original 1950s tube radio, and retro small appliances. I still like the mid-century ...

New Direction

Gone is the mid-century kitschy look to my blog, and hopefully soon, gone will be the mid-century kitschy look to my kitchen.  My tastes have turned more towards cottagecore.  After all, I do live in a cottage, and I live in the country.  Our property, our lifestyle, our values all tend organically towards the idea and aesthetic of cottagecore.  The kitchen was the only room in the house, anyway, that I mid-centuried.  The rest of the house is cottagey. Stay tuned for my cottage kitchen redo on a teeny budget.